Quick Links
Quick Links

Selling on Amazon is one of the easiest ways to dip your toes into the world of e-commerce. Whether you want to earn a little passive income or you want to become a full-fledged online retailer, Amazon can open a world of opportunities for you that may not be present if you sell on your own online store.
But to have a successful business on Amazon, you need to lay down the proper groundwork. You’re going to need to do a lot of research to maximize the profit potential of your brand. Today, we’ll be going through the fundamentals of getting started as an Amazon seller.
Step 1: Find a Product You Want to Sell
Having a product is your number one precursor when selling on Amazon. It goes without saying that if you don’t have a profitable product to sell, you have no business. Whereas, if you already have an amazing product that you believe in, then you’ve already won half the battle.
But what if you want to sell on Amazon but you don’t have a specific product yet? Don’t fret because you can always conduct thorough product research to help you launch your business. You can either do this by yourself using a product research tool or you can hire a specialist to do the work for you.
For many people, determining what they want to sell largely depends on personal preference and initial capital. However, there are certain things you need to keep in mind to ensure better chances of turning a profit. This includes:
- Making sure that there is a sizeable demand for the product or for the niche. You can verify this using simple keyword research. Amazon is, for the most part, a search engine and people use search terms and phrases to find products. On this platform, remember that product demand is determined by how frequently people search for relevant keywords.
- Avoiding oversaturated niches. The thing about Amazon is that it favors products that already exist and people are already looking for. The trap here is that you may already be competing with a lot of sellers. Remember that you’ll fare better with fewer competing sellers.
- Picking a product that will actually generate revenue. Your best bet is a product that has a 50 to 67 percent profit margin that you can sell for two to three times the cost of acquisition.
- Choosing a product that’s generally small, light, and easy to ship. Go for items that aren’t fragile and won’t require a lot of preparation to ship.
Step 2: Find a Supplier or Manufacturer
Once you’ve identified the right product for you, it’s time to find a supplier that can fill your inventory needs. Unless you manufacture the product yourself, you’re going to have to do a bit of research and comparison shopping to find the best supplier for you. You can build your inventory using these methods:
- Retail Arbitrage. Simply put, you can buy items from your local or online retail stores and resell them on Amazon. You generally go to stores like Walmart or Target or find online stores to buy discounted items and then sell them at a higher price. This is a great option of you’re new to the online retail business.
- Wholesale. Wholesale suppliers or manufacturers let you purchase products in bulk from major brands (think Adidas and Under Armour) and resell them under their brand name with their approval.
- Private Label. Private labeling involves buying a generic product in bulk from a manufacturer at a cheap price. You then customize this with your own logo and business information under your own brand name. For many people, this is the simplest and most scalable way to get started with selling on Amazon.
Step 3: Register for an Amazon Seller Account
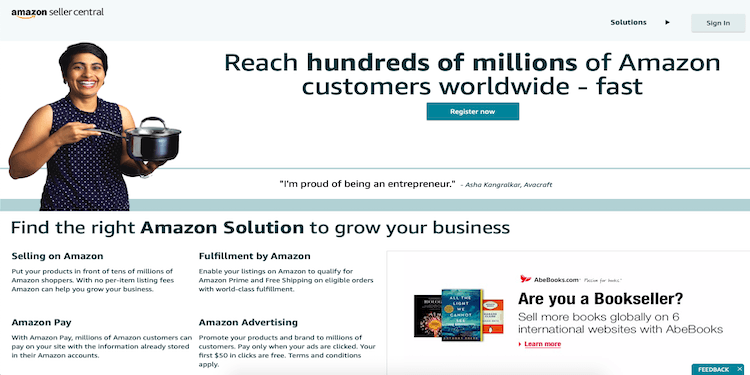
Once you have your product and supplier set, it’s time to set up your own Seller Account on Amazon. Visit Seller Central and sign up. You will need to input information such as your business name and address, telephone number, credit card or bank information, and tax information.
Once you have that set up, you will enter your billing information and choose a seller account type—Individual or Professional.
Under an individual account, you will be able to:
- Add new products to the Amazon catalog
- Have Amazon handle customer service, shipping, and fulfillment with Fulfillment by Amazon service for Amazon.com orders
- Access to 20 product categories with a maximum of 40 items sold per month
- No subscription fee but you’ll be charged $0.99 per sale
Meanwhile, under a professional account, you’ll reap these additional benefits for just $39.99 per month:
- Sell products in the US, Canada, Mexico or all three
- Use bulk listing and reporting tools from Amazon Marketplace Web Service
- Customize your shipping rates
- Offer special promotions and gift wrap options for your products (does not apply to Books, Music, Video, DVDs, Software, and Video Games)
- Eligible for top placement on product detail pages
- Access to 30 product categories
- Eligibility to sell additional restricted categories upon approval
Step 4: Choose a Fulfillment Method
As part of setting up your account, you’ll also need to choose a fulfillment method for your products. This is an important step because you’ll determine how your products will be stored, picked packed, ad shipped to customers.
Amazon offers you two options for this: Fulfillment by Merchant (FBM) or Fulfillment by Amazon (FBA).
Pros and Cons of FBM
With FBM, you will list your products on Amazon and then you’ll be the one to handle all aspects of inventory storage and order fulfilment. This means you’re also responsible for any late missing, or damaged packages. It is best for small scale businesses or for merchants who want full control over the fulfilment process.
- Hands-on fulfillment which allows you to take ownership of the actual fulfillment process
- Fewer Amazon fees which means you’ll get slightly more sales
- Potentially getting access to Amazon Prime as long as you have a Professional account, premium shipping volume, and outstanding performance
There is, of course, some cons to FBM options including more responsibility on your overhead costs related to warehousing, potentially lower conversions, and the elusiveness of the Amazon Buy Box.
Pros and Cons of FBA
Meanwhile, with FBA, you list your products on Amazon, send your inventory to the Amazon Fulfillment Center, and they will take care pf picking, packing, and shipping the products for you. This is a good option for high volume and large margin products.
This hands-off fulfillment model affords you these benefits:
- Prime eligibility and access to benefits such as free two-day shipping
- Buy Box Advantages which improves your conversion rates
- Multi-Channel Fulfillment
- Lower shipping rates depending on the size and weight of your product
There are cons to FBA as well including incurring additional fees, limited access to your inventory, tax obligations, as well as having to prepare and label products prior to shipping to the Fulfillment Center.
Step 5: Create Your Listing
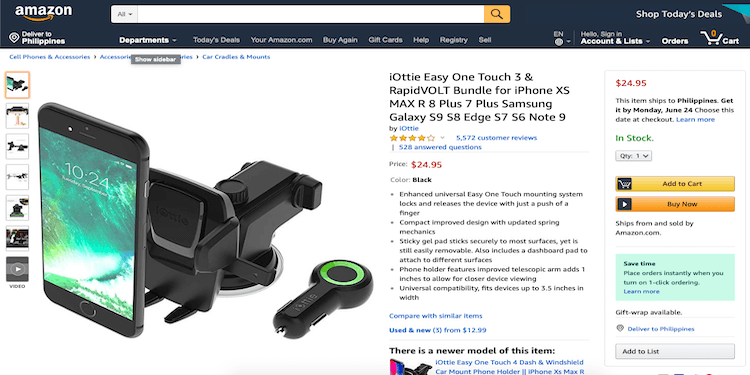
After creating an Amazon Seller account, you have to create your product listing. It allows you to share information about your product to the shoppers. With this in mind, it’s important to be as accurate as possible and to make your text appealing to customers. A typical listing contains these elements:
- Title. This is the first thing that shoppers see in the search results list. Your title should always provide an accurate overview of the product and should always follow the guidelines set by Amazon like proper capitalization and avoiding promotional messages and subjective commentary. Some products will require you to include dimensions or quantity counts.
- Bullet Points. In this section, you’ll have to indicate the features of the product. You can elaborate on the important aspects and use keywords that might not have had space for in the title.
- Product Description. Under the product description, you can get into more detail about your product using the voice that you want your brand to be known for. Think about what your customers would most likely want to know about the product they’re looking for. Don’t forget to use keywords!
- Amazon allows 5 to 9 photographs for each listing. The image must be the cover art or a professional photograph of the product being sold. Drawings or illustrations of the product are not allowed. Be sure to include photos of the different angles of the product. Images must also not contain gratuitous or confusing additional objects. You can, however, include photos of the product in action.
Step 6: Optimize Your Product Listing
As mentioned above, when selling on Amazon you also have to take into consideration the platform’s nature as a search engine. People will only find your product if they search for it and it appears in search results.
That being said, it’s important to optimize your product listings so that you can get the attention of more shoppers. Remember that the higher your search ranking is, the more sales you can make in a month. Here are a few things you can do to boost your listings in search results:
- Make it a habit to fill out all product fields to drive traffic to your listing
- Get the category of your product listing right
- Make the most out of your titles and use the formula Brand + Model Number + Model Name + Product Type, Color
- Make sure that you have awesome product images that follow the guidelines to-a-T. You can also include videos of the product being used in a practical setting
- Perfect your bullet points by using one keyword per item and prioritizing your list based on relevance.
- Leverage the product description section and address the main pain points of your customers and highlighting its best features.
Alternatively, you can also turn to freelance professionals specializing in Amazon optimization to boost your products ranking.
Step 7: Promote Your Products and Drive More Sales
As with any business, selling on Amazon requires marketing to get your products out there and to generate leads and conversion. Apart from optimizing product descriptions, there’s also a bunch of marketing strategies you can use to boost your visibility. This includes:
- Using the Amazon Marketing Services. This is similar to Google Ads in that it uses a pay-per-click system. Here, you can run marketing campaigns based on your needs. Amazon offers three options: Sponsored Products, Sponsored Brands, and Product Display Ads.
- Enhanced Brand Content. This is another feature that is only available to Professional sellers. It enables brand owners to change the product descriptions of branded ASINs. Using this tool, you can describe your product features in a different way by including a unique brand story, enhanced images, and text placements.
- Email Marketing. One of the best ways to develop customer relationships and thereby promoting your products better is through email marketing. However, you cannot collect emails on Amazon so your best bet is to do this through external traffic campaigns. You then use email marketing to send a promo code to your email list which directs them to your Amazon listing.
- Social Media Marketing. An important aspect of selling on Amazon is building a community around your brand. While you cannot specifically do this on Amazon, you can do this through social media. Through social media marketing, you are able to build a brand voice more effectively engage with leads and existing customers, and establish yourself as a thought leader in your niche.
Apart from typical platforms like Facebook, Twitter, and Instagram, you can also consider using Amazon Spark. It is a feed of stories and photos from Amazon customers featuring products ready for purchase. Spark is available in the U.S. on the Amazon App for iPhone and Android version 14.2.1 or higher.
Closing Thoughts
For the uninitiated, Amazon can be a tricky place to navigate. But with the tips we’ve mentioned above and with a bit of dedication, you’ll soon have. Success online retail business.
If you want to know more about building a profitable e-commerce business on Amazon, the FreeUp blog has tons of resources to help you out. We publish new articles weekly so don’t forget to come back for your dose of savvy business advice.

