
Quick Links
Quick Links
If you’ve ever needed to teach someone a new process, demonstrate how your product works, or share your expertise through a tutorial or a presentation then you know just how important instructional videos are. Often, it is a much more efficient way to show people how to do something rather than have them read about it.
In order to make great instructional videos, you’re going to need a good screen recorder that not only allows you to capture your screen but also allows you to edit, add information, and integrate other features.
A screen capture software like Loom can help you create instructional videos that you can use for a variety of purposes including tutorials and training materials. If you don’t know where to start then this blog is for you!
Today, we’ll be talking about how you can make videos using Loom screen recorder. Let’s get started!
What is Loom?
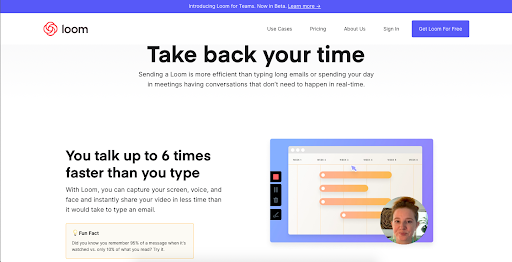
Loom is a free screen recording platform that allows you to make quick videos using a lightning-fast video recorder capable of capturing your screen, webcam, and microphone.
With this tool, you’ll be able to record videos you can record your screen, voice, and face to create an instantly shareable video.

It offers the following useful features:
- Fast Recording. You can easily record your screen or a specific app, with or without your camera.
- Instant Sharing. Once you hit stop, and a link is automatically copied to your clipboard to share.
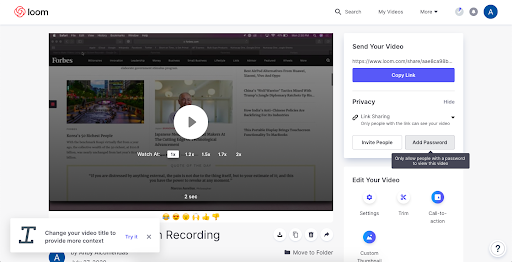
- Easy Editing. With its built-in editing tool, you can trim videos, add calls-to-action, and even custom thumbnails.
- Rich Reactions. Viewers can express themselves and react to your video with emoji and comments.
- Controlled Viewing. With Loom, you don’t have to worry about unauthorized persons getting a hold of your videos. You can require a password or make your video viewable only to specific email addresses.
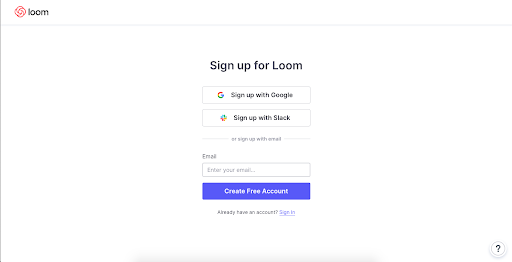
What’s great about Loom screen recorder is you can use it on a variety of systems including Windows, Mac, and iOS. Simply sign up with your Google account, Slack, or your preferred email address and you can start downloading their desktop app.

Installing Loom on your desktop is simple. Just download the desktop screen recorder app here and follow the prompts for your system.
If you’re using a Mac device, move Loom to your Application folder and then Launch it. You can also drag the Loom icon to your task base for easy future access.
Meanwhile if you’re using a Windows PC, simply run the .exe file and follow the instructions. Then search your start menu or application folder for Loom. Drag the Loom icon to your desktop for future access.
You can also download and install the Loom Chrome Extension on your Google Chrome browser for an even simpler screen recording experience. Simply visit the Chrome store and select ‘Add to Chrome’. Follow the prompts to enable your microphone and camera access, then the Loom extension will appear next to your URL bar. After successfully adding the extension, you need to complete your installation by signing up (if you are new to Loom) or logging into your account.
Benefits of Using Loom Screen Recorder
- Fast and easy to learn and use
- Simple to use. Just select your settings, press record, and you’re done.
- Offers editing options on the Loom website
- You can store up to 25 videos even with a free account
- Videos can be downloaded even with just a free account
- Allows for browser recording
- Renders videos quickly
- You can record specific windows, apps, or your whole screen
How to Make Videos Using Loom Screen Recorder
Recording Videos Using the Desktop App
1. Open the Loom desktop app and select a recording type:
- Screen + Cam allows you to record both your screen and your computer’s camera at the same time.
- Screen Only lets your recording your whole screen or a portion of it.
- Cam only records a video of your face using your computer’s camera.
2. Select how much of your desktop should be recorded in Loom. You have three options:
- Full Screen records your entire desktop
- Window records a specific application window
- Custom Size records a portion of the desktop depending on a selection you’ll make. This, however, requires a pro subscription.
3. Configure your camera and microphone sources. Select the camera and microphone you want to use. For best results, make sure that you are using high-quality tools.
4. Press “Start Recording” to begin your session. A countdown timer will begin and once your session starts, a red “recording” button will appear on the left-hand side of the desktop.
If you hover your mouse pointer on it, three buttons will appear including Pause (lets you pause the session), Delete (lets you stop the recording and discard it), and the Drawing tool button (available only with a pro subscription and is meant to be a focusing tool).
5. Once you’re done recording, click on the Stop Recording button.
Recording Videos Using the Loom Extension for Chrome
1. Start your recording by clicking on the Loom extension on your browser.
2. Select from the Recording Settings options the will appear. Much like in the desktop version, you have three options:
- Screen + Cam: Records your screen and camera
- Screen Only: Records just your screen with no camera
- Cam Only: Records only your camera
3. For the options Screen & Cam and Screen Only, you will also have the option to decide whether if you want a Full Desktop or Current Tab recording. You will also see an Audio indicator that tells you if your microphone is enabled and capturing audio before you start recording. This helps you ensure recordings with sound.
4. Advanced options are provided where you can customize your microphone & camera inputs, and whether you’d like to show/hide your camera controls.
5. Once you’re satisfied with your Recording Settings, go ahead and click Start Recording.
6. Once you’re done recording, click on the Stop Recording button.
Editing, and Sharing Your Loom Videos
After you’ve finished capturing your screen using the Loom screen recorder, you’ll be directed to the Loom website your video is automatically saved. Here, you can edit your video using any or all of the four options available:
- Settings let your toggle things like comments, email notifications about new comments, emoji reactions, and the Loom Branded player. You can also let your viewers download your video and show them the video analytics.
- The Trim option launches a trimming view of the video with a button (Start Trimming) that launches the trimming functionality.
- The call-to-action option allows you to add and position a button in the video that will launch a URL. You can change the color of the button background and text as well as select the shape of the button from a drop-down.
- Loom supports the ability to add a custom thumbnail to your video. Loom recommends that the thumbnail be a 1280 x 720px image.
After editing your video, you can choose how you want to share it with people. Link Sharing lets you send a URL so that only those with the link can view it.
Meanwhile, the Public option lets anyone view the video.
Finally, the Custom Access option allows the creator of the video to add specific email addresses to their screen recording and only these people can view it.
Alternatively, you can also choose to download your Loom screen recorder video file so you can further edit it on a video editing software or publish it on platforms like Youtube.
Final Words
Loom is a simple way to create tutorials, walkthroughs, and training materials by recording your screen and more. You can easily create instructional videos that will get your message across to your audience easily.
Do you need more tips on improving your processes? Then head on to the FreeUp blog. We have tons of resources to help scale up your business with ease!

